Grown-Up Goals. Kid-Sized Joy. Learning in disguise.
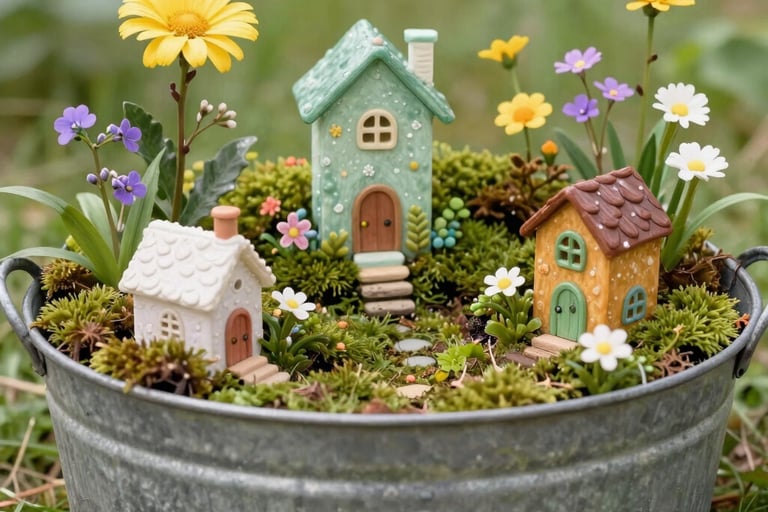
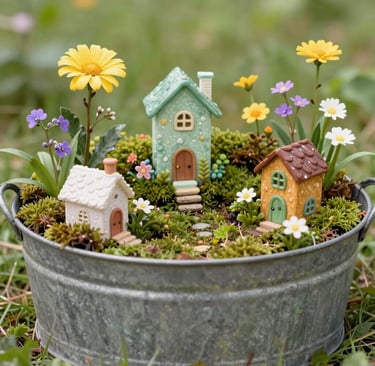
A Fairy Garden Center
...a magical way to combine sensory play, fine motor skills, and storytelling. For 3- to 5-year-olds, this center works best as a "living" station that evolves over time
Activity Ideas
Magic Potion Mixing: Provide small vials of water, "fairy dust" (biodegradable glitter), and flower petals. Children can mix "potions" to help the garden grow.
Fairy Home Architecture: Challenge children to build "villas" using only natural materials like bark, flat stones, and twigs. This is a great bridge between block play and nature art.
The Wishing Well: Place a small bowl of water in the center. Give children rocks to count as they make a wish for the garden. These rocks can be painted to add color and whimsy. Sparkly paint would make the rocks more appealing.
Fairy Mail: Set up a tiny mailbox made from a jewelry box. Provide tiny scraps of paper and golf pencils so children can draw "letters" to the fairies.
Sensory Dig: Hide "dragon eggs" (painted stones) or "fairy gems" in a bin of moss or black beans and have children use tweezers to find them.
Preschoolers require constant supervision with small parts. Always remember that small items are a serious choking hazard, always ensure the child understands not to put them in their mouths.
Expanded Supply List
Beyond the basics, these items add texture and depth to the experience.
Magical Touches
Succulents or Moss
River Rocks & Pebbles
"Fairy Dust" (biodegradable glitter)
Wheatgrass seeds (Fast-growing)
Tree Cookies (Wood slices)
Glass Gems & Marbles
Pinecones & Acorn Caps
Tiny Burlap Scraps
Mini Bunting/Flags
Dried Lavender or Herbs
Popsicle Sticks & Twine
Small Mirrors (for "ponds")
Literacy & Math Integration
Fairy Journals: Create small booklets where children can "document" sightings of fairies or draw the changes they see in the plants.
Counting Petals: Use a "Recipe Card" printable: "To make a fairy bed, you need 4 leaves and 2 soft petals."
Symmetry Mandalas: Encourage children to create symmetrical patterns on the ground using the stones and gems.
Books to Inspire the Center
"Backyard Fairies" by Phoebe Wahl: Beautifully illustrated book that encourages children to look closely at nature.
"The Night Fairy" by Laura Amy Schlitz: A story about a fairy who has to adapt to the "real world" of a garden.
"A Fairy Went A-Marketing" by Rose Fyleman: A classic rhythmic poem about a fairy’s kindness toward animals.
The "Invisible" Teacher Tip
To keep the magic alive, occasionally "change" the garden when the children aren't looking. Move a figurine, leave a tiny "thank you" note on a scrap of leaf, or add a few new gems. This sparks immediate descriptive language as children notice and discuss the changes with each other.
Whether you are setting up the Fairy Garden in a sunny corner of the classroom or as an outdoor exploration station, the key is to balance stability (so the plants survive) with flexibility (so the children can play).
Indoor Sensory Bin Version
An indoor version is perfect for year-round play and allows for finer, "drier" materials that wouldn't survive the wind or rain.
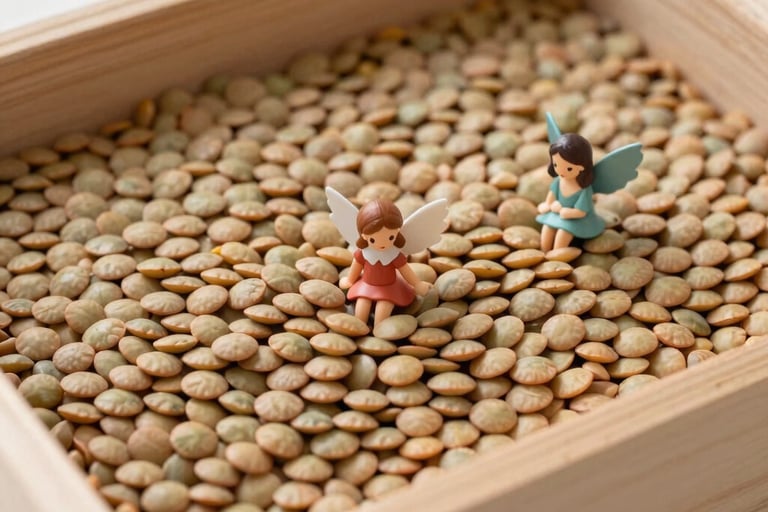
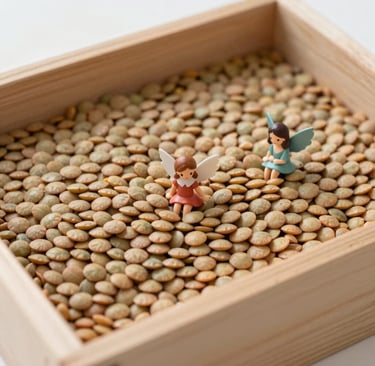
The Base: Use a large, shallow plastic tub or a wooden "tuff tray." Fill it with a mix of dried black beans or lentils (to look like soil) and clumps of preserved craft moss.
The Plants: Since real plants can be tricky indoors with 20 little hands, use artificial succulents or "air plants" that don't require soil.
Unique Indoor Activities:
Magnetic Fairies: Tape small magnets to the bottom of the figurines. Children can move them through the "forest" by sliding a magnet wand underneath the bin.
Light Table Play: If you have a light table, use translucent "fairy gems" and colored glass pebbles. The glowing "pond" adds a layer of magic.
Cleanup Tip: Place the bin on a large sheet or a "mess mat." At the end of the day, you can just lift the corners of the sheet and pour any escaped beans back into the bin.
Indoor Sensory Bin Version
An indoor version is perfect for year-round play and allows for finer, "drier" materials that wouldn't survive the wind or rain.
The Base: Use a large, shallow plastic tub or a wooden "tuff tray." Fill it with a mix of dried black beans or lentils (to look like soil) and clumps of preserved craft moss.
The Plants: Since real plants can be tricky indoors with 20 little hands, use artificial succulents or "air plants" that don't require soil.
Unique Indoor Activities:
Magnetic Fairies: Tape small magnets to the bottom of the figurines. Children can move them through the "forest" by sliding a magnet wand underneath the bin.
Light Table Play: If you have a light table, use translucent "fairy gems" and colored glass pebbles. The glowing "pond" adds a layer of magic.
Cleanup Tip: Place the bin on a large sheet or a "mess mat." At the end of the day, you can just lift the corners of the sheet and pour any escaped beans back into the bin.

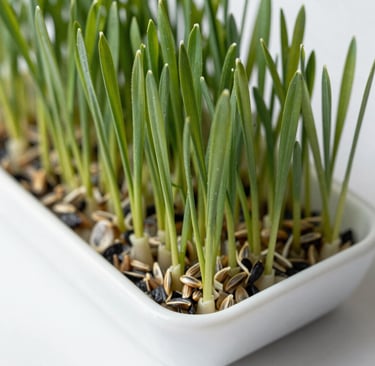
Sprouting Wheat Berries for Fairy Grass
If you start indoors, you can plant Wheatgrass seeds in the bin. It grows incredibly fast (within 5–7 days), creating a lush green "forest" that the children can actually trim with safety scissors—a fantastic way to practice scissor skills while "landscaping" for the fairies!
Supplies Needed
A Shallow Bin: A plastic sensory bin or even a sturdy baking tray (about 2–3 inches deep).
Hard Red Wheat Berries: You can find these in the bulk section of health food stores or online (often sold as "Wheatgrass Seeds").
Potting Soil: A light, organic potting mix.
A Spray Bottle: For gentle watering.
A Paper Towel or Thin Cloth.
The Step-by-Step Process
1. Soak the Seeds (The Jumpstart)
Soak your wheat berries in a bowl of cool water for 8 to 12 hours (overnight). This softens the outer shell and tells the seed it’s time to wake up. Rinse and drain them well before planting.
2. Prepare the Bed
Fill your sensory bin with about 1 to 2 inches of potting soil. You don’t need deep soil since the grass won't be growing for months. Smooth it out so it’s flat like a field.
3. Sow the "Field"
Spread the soaked seeds across the surface in a thick, even layer. Unlike a garden, you want the seeds to be touching—this creates that dense, "carpet" look. Lightly press them into the dirt, but don't bury them deep.
4. The "Dark Phase"
Mist the seeds thoroughly with your spray bottle. Cover the bin with a damp paper towel or a piece of cardboard to keep the moisture in and light out. Check on it daily and spray if the soil feels dry.
5. Let There Be Light
Once you see tiny green sprouts (usually after 2–3 days), remove the cover and place the bin in a spot with indirect sunlight. Continue to mist the soil daily. Note: Try to water the soil directly rather than just the blades to prevent mold.
Sensory Table Ideas
Once the grass is about 3 to 4 inches tall, it’s ready for the children.
The "Mowing" Station: Provide child-safe scissors so they can "mow" the grass. It’s excellent for fine motor practice, and the grass smells wonderful when cut.
Ranch Life: Add your plastic horses, cows, and tiny fences. The grass acts as a realistic pasture for the animals to "graze."
Hidden Treasures: Hide small rocks painted to look like "gold nuggets" or colorful stones in the tall grass for the children to find.
Maintenance Tip
Watch for Mold: If the air is very humid or the seeds are too wet, you might see a white fuzz at the base. To prevent this, make sure your bin has a little airflow and don't over-saturate the soil.
Since wheatgrass grows so quickly, do you think the kids would enjoy measuring its height with a ruler each morning to see how much it "slept and grew"?
Get in touch
Questions? Comments? Concerns?
info@joyfulletters.com
Affiliate Disclosure: Some of the links on this page are affiliate links. As an Amazon Associate, a Walmart Partner, and an affiliate for select educational brands, I earn a small commission from qualifying purchases. This never raises the price for you. I only recommend items that add true value to a play-based learning environment. Thank you so much for supporting our page!
© Joyful Letters 2025-2026 ALL RIGHTS RESERVED. Permission is given to reproduce for individual classroom use. Our content material is not to be resold.
Follow us on Facebook